1. Introduction to LangChain4j
Concept
LangChain4j is an open-source Java library/framework designed to simplify the process of integrating and using large language models in Java applications. Its design goal is to enable Java developers to easily build complex AI applications (such as chatbots, intelligent assistants, retrieval-augmented generation systems, etc.), just like using Python’s LangChain.
Features
LLM Integration: Provides a unified API that allows you to call various mainstream large language models (such as OpenAI, Google, Anthropic, domestic models, etc.) without directly interfacing with their low-level interfaces.
Modularity and Extensibility: The framework adopts a modular design where different components can be imported separately, such as model providers, vector databases, memory management, tool invocation, etc.
RAG Support (Retrieval-Augmented Generation): Converts external text data into vectors, combines with vector databases for semantic retrieval, and injects results into model context to improve answer quality.
Tools and Agents: Supports function calling, external tool integration, and agent workflows to build more complex AI task flows.
Integration with Java Ecosystem: Can be used in combination with common Java frameworks (such as Spring Boot, Quarkus).
2. Integrating LangChain4j with Java
Adding Dependencies
First, we create a basic Java project. I’ll use a Maven project as an example.
First, introduce the LangChain4j core framework dependency and adapter implementation dependency (using OpenAI’s adapter implementation here), as shown below:
<dependency>
	<groupId>dev.langchain4j</groupId>
	<artifactId>langchain4j</artifactId>
	<version>${langchain4j.version}</version>
</dependency>

<dependency>
	<groupId>dev.langchain4j</groupId>
	<artifactId>langchain4j-open-ai</artifactId>
	<version>${langchain4j.version}</version>
</dependency>
For specific version features and dependencies for other interface specifications (such as Alibaba, Ollama, etc.), you can refer to the official open-source repository or official documentation. Their usage methods are basically the same as OpenAI’s.
Then we introduce JUnit dependency for unit testing:
<dependency>
	<groupId>org.junit.jupiter</groupId>
	<artifactId>junit-jupiter</artifactId>
	<version>5.11.4</version>
	<scope>test</scope>
</dependency>
Text Generation Quick Start Demo
Then we can write a unit test to quickly master the usage of LangChain4j:
@Test
public void test1() {
	ChatModel model = OpenAiChatModel.builder()
				.apiKey(System.getenv("OPENAI_API_KEY"))
				.modelName("gpt-4o-mini")
				.build();
	String answer = model.chat("Hello");
	System.out.println(answer);
}
If you have an OpenAI API key, you can directly run this test unit and view the results to output the model’s returned result.
Note that the ChatModel API was introduced in LangChain4j version 1.0.0-beta4. In previous versions, you should use ChatLanguageModel as the standard interface for chat models.
If we use other third-party APIs that also comply with OpenAI’s interface specification, we can use the baseUrl method in OpenAiChatModel to fill in the third-party API interface address. The specific interface address format needs to comply with the third-party interface documentation but should not include specific resource paths. For example, if we use the SiliconFlow interface:
@Test
public void test1() {
	ChatModel model = OpenAiChatModel.builder()
				.baseUrl("https://api.siliconflow.cn/v1")
				.apiKey(System.getenv("SILICONFLOW_API_KEY"))
				.modelName("Qwen/Qwen3-30B-A3B-Instruct-2507")
				.build();
	String answer = model.chat("Hello");
	System.out.println(answer);
}
The result after running is as follows:
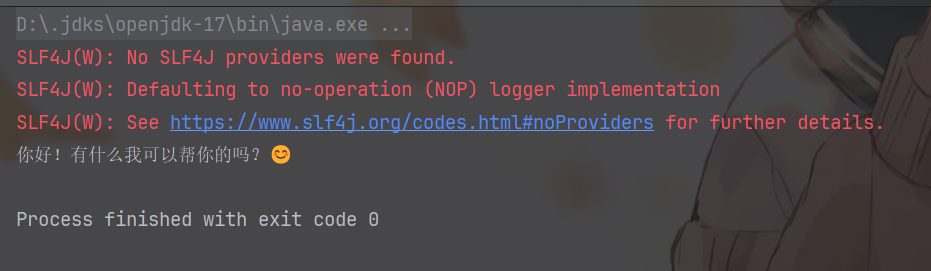
As you can see, it successfully prints the model’s returned result, along with a very cute emoji 😊.
The red warning above can be temporarily ignored. This is because the current project has not yet configured a specific logging implementation. From the dependency tree of the LangChain4j core framework, it only introduces slf4j as a logging facade without binding any specific logging implementation. Later, when integrating with Spring Boot projects, Spring Boot’s default logging implementation will automatically supplement this part:

If you don’t plan to integrate with Spring Boot projects, you can manually introduce Logback as the logging implementation to eliminate this warning. In fact, Spring Boot has already integrated and auto-configured Logback as the logging implementation by default, so you usually won’t encounter this problem in Spring Boot projects.
But since we’re only doing testing now, it’s fine not to use a logging system.
Text-to-Image Quick Start Demo
For text-to-image generation, we use ImageModel. Here I’m using Alibaba’s Qwen-Image text-to-image model. We directly call the generate method under ImageModel, passing in our text description. For example, if I want to generate an image of a “cat-eared cute girl”, we pass in this string. The return is a Response data, and we can use response.content().url() to get the direct link to the generated image.
@Test
public void test2() {
    ImageModel model = OpenAiImageModel.builder()
            .baseUrl("https://api.siliconflow.cn/v1")
            .apiKey(System.getenv("SILICONFLOW_API_KEY"))
            .modelName("Qwen/Qwen-Image")
            .build();
    Response<Image> response = model.generate("cat-eared cute girl");
    System.out.println(response.content().url());
}
The result after running is as follows:
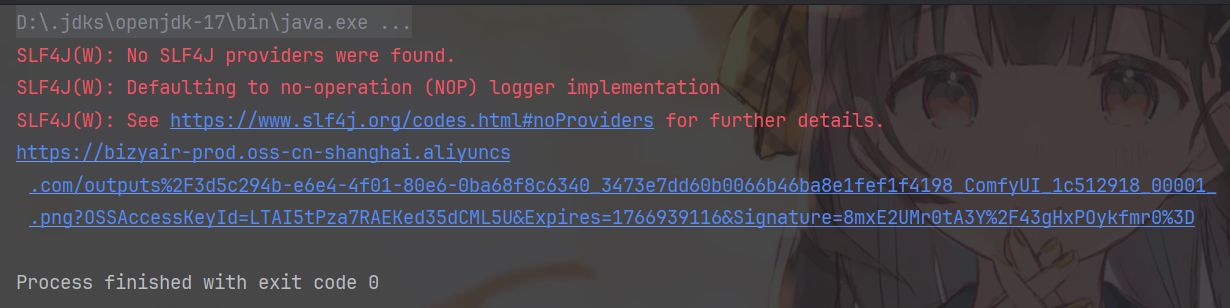
We open the link, download the image, and get the following image:

As you can see, the quality is excellent and meets our requirements very well.
Based on this, readers can further explore capabilities in other modality directions (such as text-to-speech, image-to-text, image-to-video, etc.) in combination with the API documentation of the selected platform. Note that different vendors have significant differences in interface design for multimodal capabilities: some platforms provide OpenAI-compatible extended endpoints, while others adopt their own multimodal protocols or workflow orchestration interfaces. In actual implementation, it’s recommended to prioritize solutions with stable interfaces, clear documentation, and mature ecosystems.
3. Integrating LangChain4j with Spring Boot
Quick Start Demo
To integrate LangChain4j with Spring Boot, your Spring Boot version must be 3.2 or above, and the JDK version requirement is 17 or above. Original details
LangChain4j mainly provides two types of Starters:
- Integration Starters: Used to interface with common model providers, vector databases, Embedding services, and other third-party components, providing corresponding auto-configuration and configuration capabilities for out-of-the-box use in Spring Boot.
- Declarative AI Services Starter: Used to enable and enhance declarative AI Service capabilities (such as
@AiService), supporting the definition of AI capabilities through interfaces/annotations, with the framework completing implementation generation, dependency injection, and runtime orchestration.
Integration Starters
This may sound abstract, so let’s first look at the first type of Starter. The unified specific format for this type of Starter is: langchain4j-{integration-name}-spring-boot-starter, where {integration-name} represents the specific integration object (such as a large model provider, Embedding service, or vector database, etc.). For example, if I use OpenAI’s unified interface specification, I can introduce the following dependency:
<dependency>
    <groupId>dev.langchain4j</groupId>
    <artifactId>langchain4j-open-ai-spring-boot-starter</artifactId>
    <version>1.10.0-beta18</version>
</dependency>
Here, the {integration-name} is open-ai. For the specific name format of other providers, you can refer to the official repository.
After introducing the dependency, the next step is the exciting stage of writing configuration information. We can write in application.properties or in files with formats like application.yml.
If writing in application.properties, you basically need to add the following content:
langchain4j.open-ai.chat-model.api-key=${OPENAI_API_KEY}
langchain4j.open-ai.chat-model.model-name=gpt-4o
langchain4j.open-ai.chat-model.log-requests=true
langchain4j.open-ai.chat-model.log-responses=true
...
Why use ellipsis here? These four are the basic configuration items. The first is the key information, the second is the model information, the third enables logging of request content sent to the model, and the fourth enables logging of response content returned by the model.
There are also some other configuration items that can be configured. Please refer to the official API documentation for details.
For example, since I’m now using SiliconFlow’s interface, I also need a base-url configuration item, so the overall configuration is:
langchain4j.open-ai.chat-model.api-key=${SILICONFLOW_API_KEY}
langchain4j.open-ai.chat-model.model-name=Qwen/Qwen3-30B-A3B-Instruct-2507
langchain4j.open-ai.chat-model.base-url=https://api.siliconflow.cn/v1
langchain4j.open-ai.chat-model.log-requests=true
langchain4j.open-ai.chat-model.log-responses=true
Then we write a test Controller as follows:
@RestController
public class ChatController {

    private ChatModel chatModel;

    public ChatController(ChatModel chatModel) {
        this.chatModel = chatModel;
    }

    @GetMapping("/chat")
    public String model(@RequestParam(value = "message", defaultValue = "Hello") String message) {
        return chatModel.chat(message);
    }
}
In this case, the Controller only depends on the interface ChatModel, with the specific implementation automatically created as an instance OpenAiChatModel by the starter for auto-configuration and injection, which is very convenient.
Then we write a test unit for testing:
@Autowired
private ChatController chatController;
@Test
void test4(){
    System.out.println(chatController.model("Hello, who are you?"));
}
The result after running is as follows:
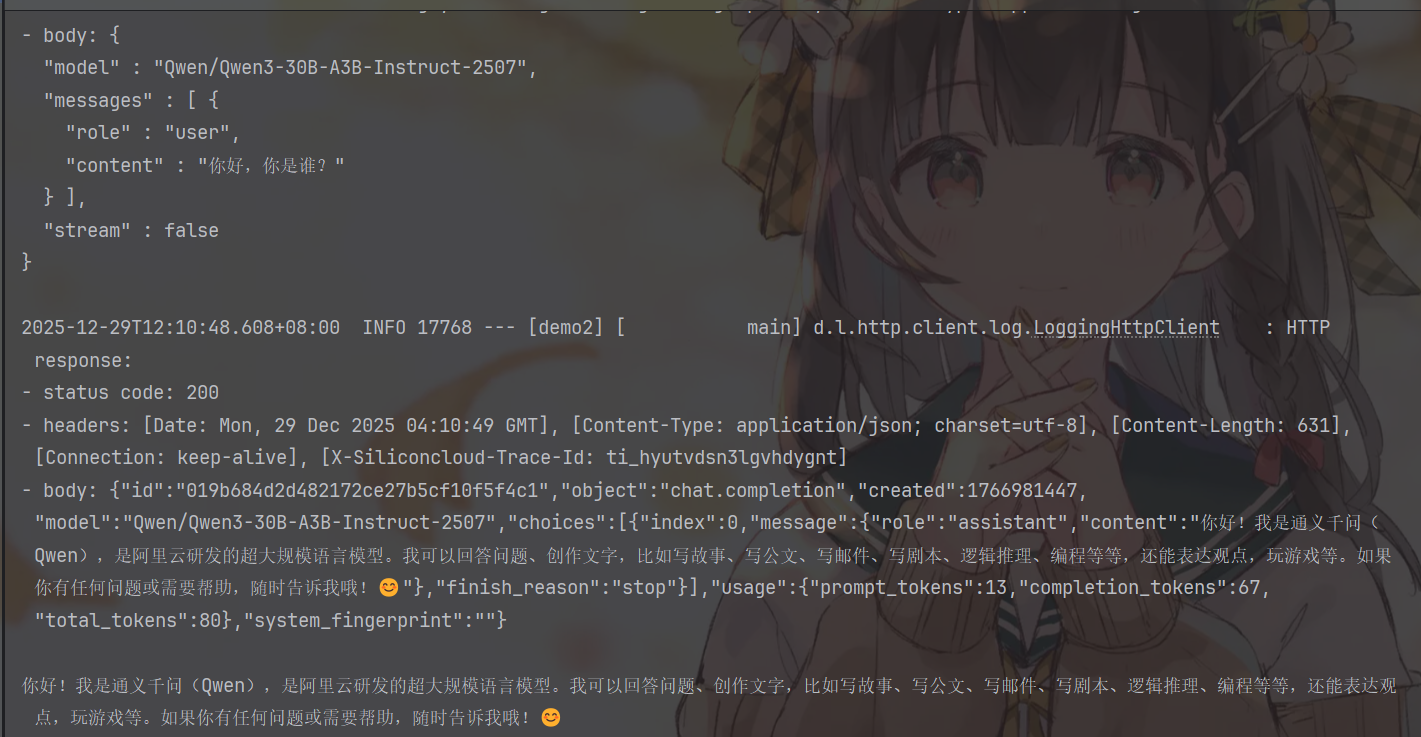
As you can see, not only do we have our sout output results, but there are also log printings of request and response content, which is the result of the two log settings we enabled in the configuration file.
In actual project development, we can customize utility classes according to our needs, for example:
@AllArgsConstructor
@Component
public class AIUtil {
    private final ChatModel chatModel;

    public String generateText(String content){
        return chatModel.chat(content);
    }
}
This is very elegant. Remember to add the @Component annotation to hand it over to the IoC container for management.
All our previous tests wait for the interface to fully generate the text before getting results and printing them. However, when we use AI for conversations on web pages, its output is often streaming, for example:

As you can see, it outputs word by word, rather than returning all content to us after retrieving everything. This output method is usually called streaming output. Its core idea is: during the content generation process, every time the model generates a token (or a text fragment), it immediately returns it to the caller, rather than waiting for the complete response to be generated.
For AI conversations in web scenarios, streaming output is almost a “standard feature”. It can significantly improve user experience:
- Lower first token latency: Users can almost immediately see the model start “talking”
- More natural interaction: Closer to the rhythm of human input
- Better suited for long text generation: Avoids long blank screen waiting
Next, let’s see how to elegantly implement streaming output in the LangChain4j + Spring Boot scenario.
In LangChain4j, streaming output is not completed through ChatModel, but through a dedicated Streaming interface, such as StreamingChatModel. When using interfaces that comply with the corresponding model provider’s specifications, LangChain4j will establish a streaming connection with the model through SSE (Server-Sent Events) at the bottom layer and callback the token increments generated by the model one by one to the caller.
Fortunately, we don’t need to manually handle these complex low-level details.
LangChain4j’s Spring Boot Starter has already encapsulated the corresponding auto-configuration capabilities for us and will automatically create and register Beans related to StreamingChatModel based on the configuration file.
First, we need to add streaming model configuration in application.properties. Unlike the chat-model used for synchronous calls earlier, here we use the streaming-chat-model prefix, as follows:
langchain4j.open-ai.streaming-chat-model.api-key=${SILICONFLOW_API_KEY}
langchain4j.open-ai.streaming-chat-model.model-name=Qwen/Qwen3-30B-A3B-Instruct-2507
langchain4j.open-ai.streaming-chat-model.base-url=https://api.siliconflow.cn/v1
langchain4j.open-ai.streaming-chat-model.log-requests=true
langchain4j.open-ai.streaming-chat-model.log-responses=true
Then we modify the utility class:
@AllArgsConstructor
@Component
public class AIUtil {
    private final StreamingChatModel streamingChatModel;

    public void generateText(String content, StreamingChatResponseHandler handler){
        streamingChatModel.chat(content,handler);
    }
}
Just change the original ChatModel to StreamingChatModel, then pass a callback handler: StreamingChatResponseHandler in the chat method. The changes are very minor.
Now Spring Boot no longer requires manually writing SSE details for streaming returns. We just need to introduce the Spring WebFlux dependency, and we can conveniently implement automatic chunking, real-time pushing, and connection management of server data by returning Flux. Spring will handle the underlying SSE protocol encapsulation and refresh logic.
The Spring WebFlux dependency format is as follows:
<dependency>
    <groupId>org.springframework.boot</groupId>
    <artifactId>spring-boot-starter-webflux</artifactId>
</dependency>
Let’s write a Service and Controller as quickly as possible for testing, as follows:
@Service
public class ChatServiceImpl implements ChatService {

    @Autowired
    private AIUtil aiUtil;

    @Override
    public Flux<String> chat(String content) {
        return Flux.create(e->aiUtil.generateText(content, new StreamingChatResponseHandler() {
            @Override
            public void onPartialResponse(String partialResponse) {
                e.next(partialResponse);
            }

            @Override
            public void onCompleteResponse(ChatResponse chatResponse) {
                e.next(" Output complete.");
                e.complete();
            }

            @Override
            public void onError(Throwable throwable) {
                e.next(throwable.getMessage());
            }
        }));
    }
}
@RestController
public class ChatController {

    @Autowired
    private ChatService chatService;

    @GetMapping(value = "/chat", produces = "text/event-stream;charset=UTF-8")
    public Flux<String> chat(@RequestParam("message") String content) {
        return chatService.chat(content);
    }
}
Next, we open ApiFox for testing. We input our test URL: http://localhost:8080/api/chat?message=Hello, who are you, and we can see the returned results popping out word by word:
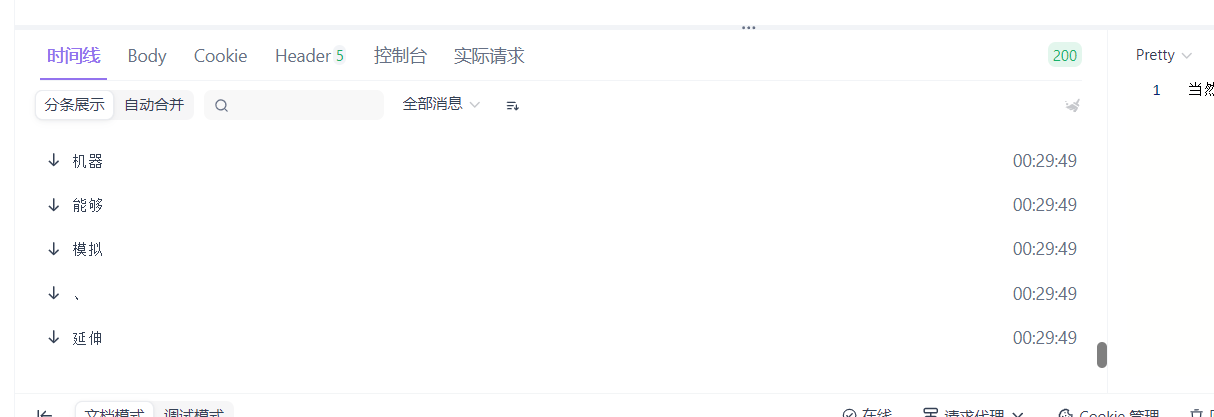
From the running results, we can see that the web side can receive real-time returned content segment by segment, which is precisely the result of the collaborative work of various callback methods of StreamingChatResponseHandler. Let’s analyze the role of these callbacks in streaming output one by one.
The several callback methods of StreamingChatResponseHandler correspond to different stages of the model generation process: when the model has not yet fully generated the result, onPartialResponse will be triggered multiple times, returning a small piece of content each time. Here we immediately push the data downstream through FluxSink.next(), thereby achieving real-time output of text on the front-end page; when the model finishes generating, onCompleteResponse is called back to indicate that this generation is complete. In actual use, the stream is usually ended here; if an exception occurs during the generation process, onError is triggered to pass the error signal to the front end. It is precisely by converting this callback-based flow into Flux through Flux.create that Spring WebFlux can automatically write data continuously into the HTTP response in a streaming manner, ultimately achieving streaming output without manually writing SSE.
In addition to the three main callback methods mentioned above, there is also an onPartialThinking method. What is this method for?
We find that many models now come with a thinking process, which first conducts reasoning. This callback is actually for handling the content returned by the reasoning process. We won’t continue discussing this here. The principle is similar to onPartialResponse. Interested friends can continue to explore. In fact, we will have more concise callback writing methods later, which we’ll continue to explore later.
Declarative AI Services Starter
LangChain4j provides a Spring Boot starter for auto-configuring AI Services, RAG, Tools, etc.
We have completed the auto-configuration of the underlying model client, but if we still stay at the level of directly injecting ChatModel and manually writing Prompt and callback logic, the overall usage is still imperative. The significance of AI Services Starter is to further abstract these boilerplate codes, allowing you to use large model capabilities through declarative interfaces just like writing ordinary Spring Services. You only need to define method signatures and annotations, and LangChain4j will automatically generate implementations at runtime, handling details such as Prompt construction, model calling, and result mapping. Combined with Spring Boot’s auto-configuration, model parameters and keys can be centrally managed in application.yml, making it convenient to switch between different environments or models. When RAG or tool calling is introduced, the advantages of this approach become even more obvious. The relevant orchestration is almost transparent to business code, keeping the code always simple, clear, and maintainable.
Next, let’s quickly demonstrate the specific usage in code.
First, we need to import the langchain4j-spring-boot-starter dependency as follows:
<dependency>
    <groupId>dev.langchain4j</groupId>
    <artifactId>langchain4j-spring-boot-starter</artifactId>
    <version>1.10.0-beta18</version>
</dependency>

<!--        langchain4j-reactor is LangChain4j's official adapter layer for Reactor (Mono / Flux),-->
<!--        because we used Flux for streaming output, we need to introduce the adapter layer dependency below.-->
<!--        If streaming output is not needed in your project, you don't need to introduce the dependency below,-->
<!--        only need to introduce the one above.-->
<dependency>
  <groupId>dev.langchain4j</groupId>
  <artifactId>langchain4j-reactor</artifactId>
  <version>1.10.0</version>
</dependency>
Then we comment out or delete ChatServiceImpl. We don’t need to manually implement such tedious code. We go directly back to the ChatService interface and add the AiService annotation to it, as follows:
@AiService
public interface ChatService {
    Flux<String> chat(String content);
}
No other code needs to be changed. Let’s run and test it in ApiFox again:
As you can see, as we expected, it can correctly give streaming responses, and we don’t need to write those tedious implementation class codes ourselves.
Let’s go back and look at the source code of @AiService to see what it actually does for us. The source code is as follows:
@Service
@Target({ElementType.TYPE})
@Retention(RetentionPolicy.RUNTIME)
public @interface AiService {
    AiServiceWiringMode wiringMode() default AiServiceWiringMode.AUTOMATIC; // Wiring mode: automatic or manually specify dependencies
    String chatModel() default "";                 // Synchronous ChatModel Bean name
    String streamingChatModel() default "";        // Streaming StreamingChatModel Bean name
    String chatMemory() default "";                // ChatMemory Bean name for conversation memory
    String chatMemoryProvider() default "";        // ChatMemoryProvider Bean name for creating memory by session
    String contentRetriever() default "";          // ContentRetriever Bean name for RAG retrieval
    String retrievalAugmentor() default "";        // RetrievalAugmentor Bean name encapsulating complete RAG enhancement process
    String moderationModel() default "";           // ModerationModel Bean name for content safety review
    String toolProvider() default "";               // ToolProvider Bean name for unified tool provision
    String[] tools() default {};                   // Specify list of tool Bean names to inject
}
As you can see, AiService also encapsulates the Service annotation. Therefore, using AiService is equivalent to using the Service annotation, so it will be scanned by Spring and managed by IoC. However, when it’s annotated on an interface, what Spring injects is not the interface itself, but a proxy implementation generated by LangChain4j at runtime based on annotation configuration. For knowledge about dynamic proxies, you can refer to another blog post of mine; this proxy will be responsible for Prompt assembly, model selection (chat/streaming), and orchestration of capabilities such as memory/RAG/tools, making interface methods look like ordinary Service calls, but actually calling large models at the bottom layer. Let’s look at its dynamic proxy part of the source code, located under dev.langchain4j.service.DefaultAiServices:
@Internal
class DefaultAiServices<T> extends AiServices<T> {
    ...
    public T build() {
        validate();
        Object proxyInstance = Proxy.newProxyInstance(
                context.aiServiceClass.getClassLoader(),
                new Class<?>[]{context.aiServiceClass},
                new InvocationHandler() {
                    @Override
                    public Object invoke(Object proxy, Method method, Object[] args) throws Throwable {
                        // Object / default method handling
                        if (method.isDefault()) {
                            return InvocationHandler.invokeDefault(proxy, method, args);
                        }
                        if (method.getDeclaringClass() == Object.class) {
                            ...
                        }
                        // Build an AI call context
                        InvocationContext invocationContext = InvocationContext.builder()
                                .invocationId(UUID.randomUUID())
                                .interfaceName(context.aiServiceClass.getName())
                                .methodName(method.getName())
                                .build();
                        // Core entry: convert interface method call to AI call
                        return invoke(method, args, invocationContext);
                    }
                    public Object invoke(Method method, Object[] args, InvocationContext invocationContext) {
                        // Prompt / Memory / RAG / Guardrails preparation
                        ...
                        // Determine if it's a streaming return
                        Type returnType = method.getGenericReturnType();
                        boolean streaming =
                                returnType == TokenStream.class || canAdaptTokenStreamTo(returnType);
                        if (streaming) {
                            // Streaming: return TokenStream or adapted type (like Flux)
                            TokenStream tokenStream = new AiServiceTokenStream(...);
                            return returnType == TokenStream.class
                                    ? tokenStream
                                    : adapt(tokenStream, returnType);
                        }
                        // Non-streaming: synchronously call model and parse results
                        ChatResponse response = chatModel.execute(...);
                        return serviceOutputParser.parse(response, returnType);
                    }
                }
        );
        return (T) proxyInstance;
    }
    ...
}
At the same time, we notice that AiService also provides many annotation properties for us to use. We’re only doing a quick start here. The specific roles of other properties will be explained in detail in separate articles later.